Monthly rollover #
1. Perform a weekly balance #
Go to the Balance sheet and perform a weekly balance to ensure all numbers are accurate and up to date.
2. Create a spreadsheet for the new month #
Open your Monthly Budget Template spreadsheet and make a new copy (File > Make a copy). Title this with the upcoming month and year (e.g. “November 2021 Expenses”).
3. Copy carryover balances into the new sheet #
Open the spreadsheets for both months (the ending month and the new month) in two separate browser tabs. It’s helpful to put these side-by-side if you have a large enough screen. Go to the Monthly rollover sheet of both spreadsheets.
The bottom half of this sheet shows all balances and uncleared income/expenses that need to be carried into the next month. The top half of the sheet provides a place to input these values into the new month.
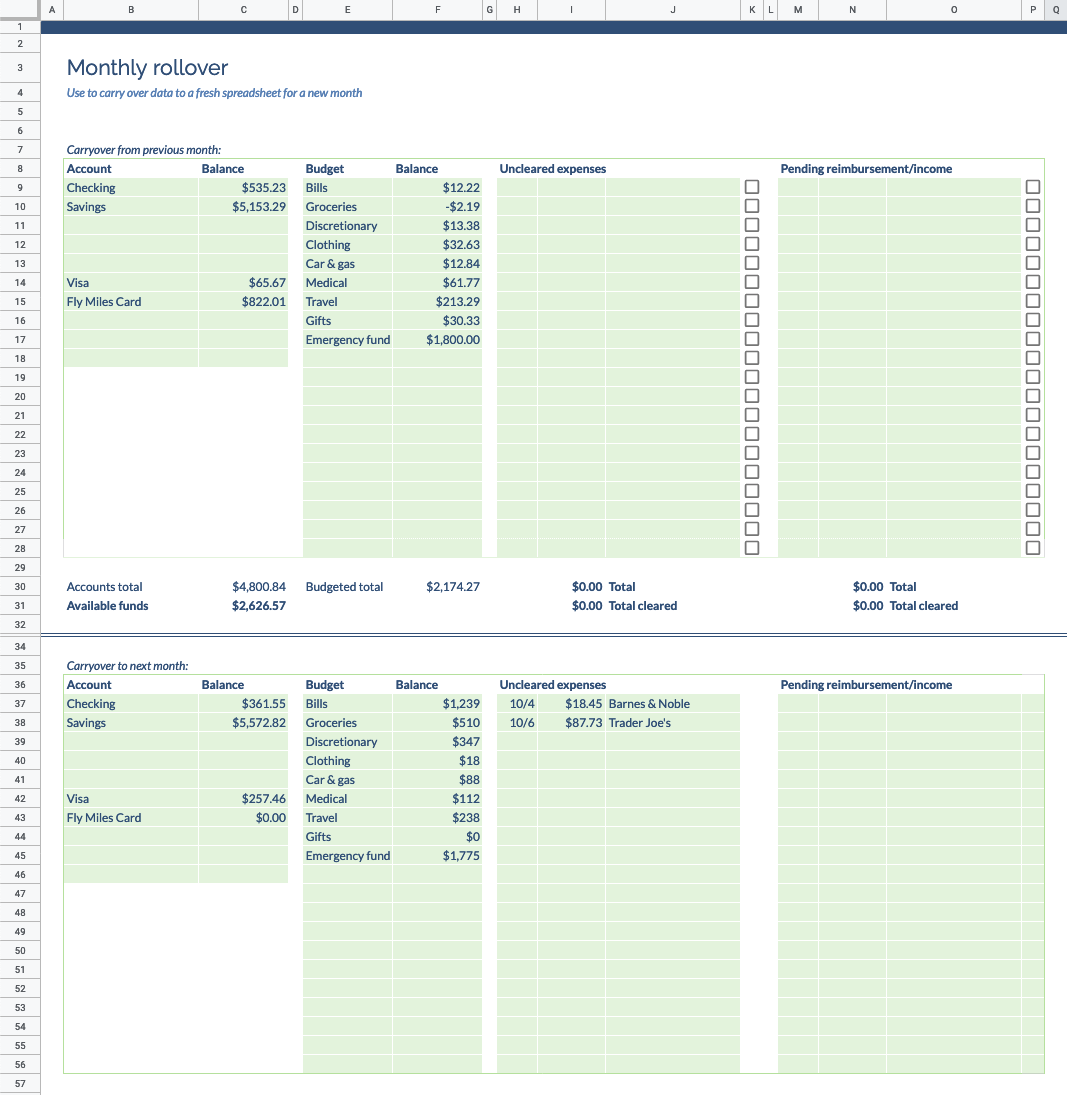
You’ll need to copy the bottom portion from old month’s spreadsheet into the top portion of the new month’s spreadsheet. However, it is important that you paste values only, when a normal copy/paste would paste the full formulas, resulting in errors. Furthermore, Google Sheets does not support pasting values only from one spreadsheet to another. (This is dumb; I know.)
So, you accomplish this one of two ways. First, you can manually enter each value by hand. This is a little tedious, but simple enough.
Second, you can copy the whole outlined area from the bottom of your old month spreadsheet, then paste it into a text editor like Notepad or Apple Notes. Then, re-copy the data from the text editor and paste this into the top area of new month’s spreadsheet.
You are now done with the old month’s spreadsheet.
4. Allocate a monthly budget #
Finally, you can allocate your available funds into your budget categories for use in the new month. Go to Allocations sheet to do this.
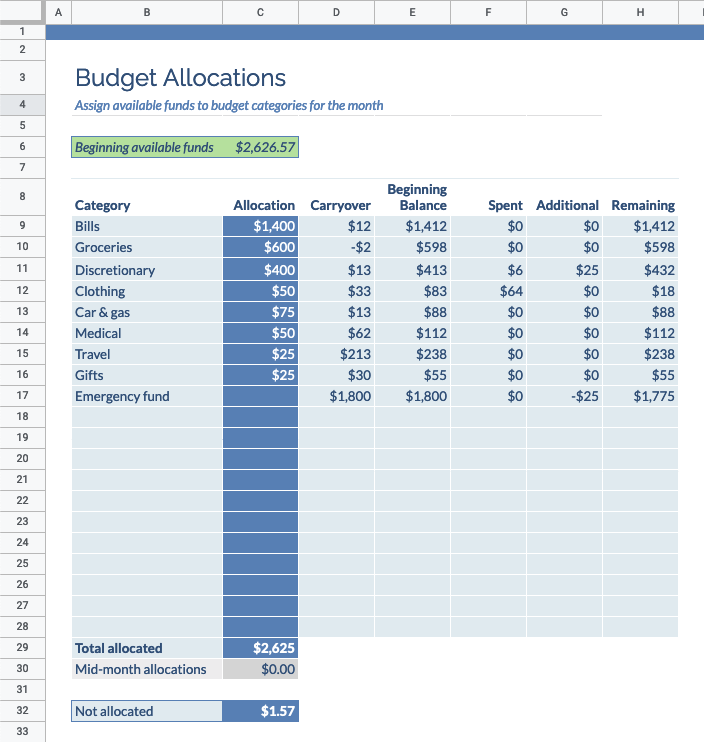
The green box at the top shows you beginning available funds, which you can allocate to your budget categories. Column D lists the carried-over balance for each category. Rounded values are shown here, but it is still tracking pennies behind the scenes.
Enter the amounts you want to add to each category in Column C. As you do, the remaining amount not allocated will update at the bottom. It’s okay to leave a little behind here; it will simply carry over into the next month, or remain available to allocate later during a mid-month adjustment.
Now you’re done and ready for a new month! Be sure to track your purchases as you make them.
Mid-month adjustment #
If you need to make changes later, you can always do so in the gray table on the right side of the Allocations sheet. Allocate more money to a category by entering an amount and selecting the category. This will pull from any unallocated funds (thereby reducing the amount available the following month).
To compensate for this, you can pull money from another category at the same time. Enter a negative amount to do this.
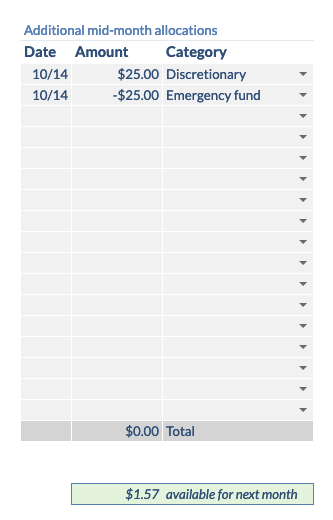
Adjustments will show in the “Additional” column to the left, adding to the remaining amount for the relevant categories.